
Shadow Tactics: Blades of the Shogun GDD
Core Loop
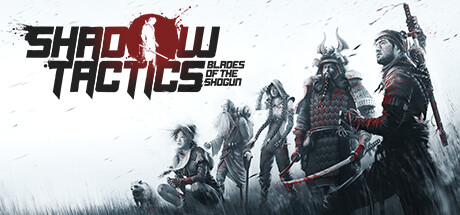
Shadow Tactics: Blades of the Shogun
- Status
- Released
- Year
- 2016
- Genre
- Indie, Strategy
- Platforms
- Windows, macOS, Linux
The core gameplay loop of Shadow Tactics operates across three nested layers: moment-to-moment stealth, mission execution, and meta-progression. ## Moment-to-Moment Loop: Observe, Plan, Execute, Manage, Iterate Every encounter follows a tight tactical cycle: 1. **Observe** - Survey enemy positions, patrol routes, vision cones, noise sources, and environmental affordances. Reading the puzzle of overlapping vision cones, patrol timing, and enemy types (Normal, Straw Hat, Samurai) is the foundational skill. 2. **Plan** - Select characters and abilities based on tactical niche (infiltration, lure/trap, crowd control, social infiltration, long-range). For multi-guard encounters, enter Shadow Mode to queue simultaneous actions for multiple characters. 3. **Execute** - Issue movement and ability commands in real-time. Noise radii, vision cone overlap, and patrol timing all matter. Shadow Mode resolves all queued actions in the same simulation tick. 4. **Manage Aftermath** - Hide bodies in concealment spots (bushes, barrels, wells, rooftops). If the alarm triggers via detection or body discovery, reinforcements spawn and the alarm persists until reload. Melee capture causes immediate mission failure. 5. **Save and Iterate** - Quicksave (F5) locks progress. Quickload (F8) rewinds on failure. This frictionless trial-and-error loop encourages experimentation with no penalty except for no-save badge constraints. ## Mission Loop: Briefing, Infiltration, Objective, Results, Replay Each of the 18 missions provides a unique primary objective (assassination, rescue, infiltration, theft, eavesdropping, kidnapping, escort, sabotage) and curated character roster (2 to 5 characters). Environmental modifiers (snow footprints, night/torchlight, water) alter stealth rules per mission. Completing the objective ends the mission immediately. Nine optional badges per mission reward mastery constraints: pacifist, no-alarm, speedrun, environmental kills, ability restrictions, and Hard difficulty. Badge conditions are hidden on first playthrough and revealed on replay. ## Meta-Loop: Campaign Progression, Mastery, Achievement Campaign progression introduces new characters, abilities (including firearms unlocked mid-campaign), enemy types (Normal Guards, Straw Hat Guards, Samurai), and environmental mechanics that progressively expand the tactical toolbox. Badge accumulation across all missions feeds into cumulative meta-achievements. Mutually exclusive path-choice badges, Hard difficulty requirements, and speedrun constraints drive deep replayability. ## How the Layers Connect The moment-to-moment observe-plan-execute cycle is the atomic unit of play. The mission loop gives it structure, stakes, and variety. The meta-loop gives it longevity through badges, replayability, and mastery challenges. Together, they create a stealth experience where patience, observation, and creative problem-solving are consistently rewarded.
Shadow Tactics: Blades of the Shogun is a real-time top-down stealth strategy game in which the player commands a squad of up to five specialists through handcrafted missions set in feudal Japan. The core loop operates across three nested layers: moment-to-moment stealth tactics, mission-level execution, and meta-progression and mastery, each reinforcing the others to create a gameplay experience built on planning, execution, iteration, and replayability.
Layer 1: Moment-to-Moment Stealth Loop
The atomic unit of gameplay is a tight tactical cycle that repeats dozens of times per mission. Every encounter with enemy guards, environmental obstacles, or patrol formations follows this rhythm:
1. Observe
The player surveys the battlefield using the isometric camera (rotatable via Q/E or Alt+mouse). The primary information channels are:
- Enemy vision cones - Colored green (safe), yellow (building detection), or red (detected). Normal Guards use baseline detection; Straw Hat Guards observe wider areas and can spot projectiles in flight; Samurai see through disguises.
- Patrol routes and timing - Guards move along predetermined paths at fixed speeds. Understanding patrol timing is essential for identifying safe windows.
- Auditory signatures - Each ability and movement type produces noise within a visible radius (blue circle indicator). Different characters produce different footstep noise levels (Hayato is silent when running; Takuma is loud).
- Environmental affordances - Bushes and building interiors provide concealment; snow leaves followable footprints; darkness reduces enemy vision range while torches restore it; barrels, rocks, icicles, carts, and cranks can be triggered for environmental kills or path manipulation; hook-rings, vines, ladders, and water enable or block traversal depending on character archetype.
- Enemy type composition - The mix of Normal Guards, Straw Hat Guards, Samurai, and civilians in an area determines which tactical approaches are viable.
The observation phase is essentially puzzle-solving: the player reads the interconnected systems (vision, noise, patrols, environment) to identify weaknesses, timing windows, and opportunities.
2. Plan
Once the encounter is understood, the player formulates an approach:
- Character selection - Each of the five characters occupies a distinct tactical niche: Hayato (infiltration: silent running, grappling hook, shuriken), Yuki (lure/trap: pressure-triggered traps, bird whistle, pickpocketing), Mugen (crowd control: Sword Wind area attack, sake lure, 6 HP, dual body carry, heavy object throwing), Aiko (social infiltration: disguise system, conversation distraction, sneezing powder), Takuma (long-range: scoped rifle, grenades, tanuki companion).
- Ability selection - Each character has four active abilities mapped to A/S/D/F. The player determines which ability best fits the situation.
- Positioning - Characters must reach specific positions (behind a guard, in a bush, on a ledge) before the plan can execute. Movement archetype (agile vs heavy) gates which traversal options are available.
- Shadow Mode - For encounters where multiple guards watch each other, the player enters Shadow Mode (LSHIFT) to queue one action per character. The game does not pause; enemy patrols continue to move while the player plans. Queued actions are indicated by blue circular icons above character positions. When executed (ENTER), all queued actions resolve simultaneously within the same simulation tick, preventing detection cascades.
3. Execute
The player issues commands and commits to the plan:
- Movement - Characters move in real-time. Stance (standing, crouching, running) affects noise emission and detection probability.
- Abilities - Abilities fire in real-time with visible targeting indicators (noise radius circles, ability ranges). Some abilities are instant (stone throw, trap placement); others have animations (melee takedowns, rifle aiming).
- Simultaneous coordination - Shadow Mode triggers all queued actions at once. A dual takedown of mutually-watching guards succeeds because both die in the same simulation tick.
- Environmental triggers - Pushing barrels, pulling cranks, dropping icicles, rolling carts all happen in real-time with physics-based results.
Execution is where the plan meets reality. Patrol timing may have shifted; an enemy may have turned unexpectedly; a noise may have traveled further than anticipated.
4. Manage Aftermath
After any action, the player must deal with consequences:
- Body hiding - Eliminated enemies leave bodies that will trigger alarm if discovered. Bodies can be carried (Hayato, Mugen), dragged (Yuki, Aiko – passable through outer vision cones), or thrown (Mugen – onto roofs, onto enemies). Concealment spots include bushes, rooms, barrels, wells, and rooftops. Traps in bushes automatically hide the victim’s body.
- Detection management - If a civilian spots the player, they panic and flee (no alarm). If an enemy reaches suspicion (question mark), the player has a brief window to break line of sight. Full detection (exclamation mark) triggers the Alarm Response System: additional reinforcements spawn (Normal Guards; rarely Samurai in later missions), all enemies enter search behavior, and the alarm persists for the remainder of the mission – it can only be cleared by reloading a save.
- Mission failure - If an enemy catches a player character within melee reach during full detection, the mission fails immediately.
5. Save and Iterate
The Quicksave/Quickload system (F5/F8) is the engine of iteration:
- Quicksave creates a full mission-state snapshot at any point during active gameplay. The HUD displays a “Last Save” timer to remind the player when they last saved.
- Quickload restores all positions, AI states, detection levels, alarm states, ability cooldowns, and the mission timer to the snapshot.
- Badge persistence - Earned badges remain earned across reloads. Cumulative progress (developer kills, total eliminations) persists account-wide. This means reloads are costless for meta-progression, even as they rewind tactical state.
- Save invalidation - Creating a quicksave invalidates badges with “no save” constraints. This adds a risk/reward layer: the player must choose between safety (save frequently) and badge pursuit (dont save at all).
- Iteration philosophy - The system encourages experimentation. Players can quicksave after confirming a successful action, attempt a risky strategy, reload on failure, and try a completely different approach without penalty (except for no-save badge constraints).
Layer 2: Mission Execution Loop
Each mission structures the moment-to-moment loop within a larger arc with distinct phases:
Phase 1: Briefing and Setup
- Objective assignment - Each mission has a primary objective: Assassination (eliminate a named target), Rescue (free an ally and escort to extraction), Infiltration (reach a target zone undetected), Theft (steal documents/items), Eavesdropping (overhear conversations), Kidnapping (abduct a target alive), Escort (guide a character to extraction), or Sabotage (destroy objects/cargo).
- Character roster - The mission defines which 2-5 characters are available. Earlier missions restrict the squad; later missions unlock the full five-character roster. The curated roster forces the player to work within specific ability constraints.
- Environmental modifiers - Some missions introduce special rules: snow (temporary footprints that enemies follow), night/darkness (reduced enemy vision range but torches extend it), water (blocks heavy characters, enables swimming for agile characters).
- Badge preview - On first playthrough, badge conditions are hidden. On replays, all nine badge conditions are visible, guiding the players approach.
Phase 2: Infiltration and Encounter
The moment-to-moment loop plays out across the handcrafted level. The player moves through guarded zones, one encounter at a time, using the observe-plan-execute-manage-iterate cycle. The level design encourages viewing the entire map as a single interconnected puzzle. Clearing one area may open flanking routes for the next, and the order of eliminations matters.
Phase 3: Objective Completion
Achieving the primary objective immediately ends the mission. This creates a clean boundary: there is no post-objective cleanup phase (except for rescue/escort objectives where the extraction IS the objective).
Phase 4: Results and Badge Evaluation
The post-mission results screen displays:
- Completion statistics - Characters used, mission time, kill counts.
- Badge status - For each of the 9 badges: grey (still achievable), red (failed), or earned. Badge conditions are revealed after first completion.
- Character usage breakdown - Shows which characters the player relied on, encouraging diversity on replays.
Phase 5: Replay
Missions can be replayed from the mission select screen. Badge conditions are now revealed, and the player can pursue remaining badges, often requiring fundamentally different strategies:
- A pacifist run requires avoiding all kills, using only knockouts and distractions.
- A no-alarm run demands perfect body hiding and detection avoidance.
- A speedrun badge imposes a tight time limit.
- Environmental kill badges require using barrels, icicles, carts, and cranks.
- Path-choice badges are mutually exclusive, requiring multiple playthroughs (or save-scumming) to earn all nine.
Layer 3: Meta-Progression and Mastery
Across the full campaign of 13 missions (plus 5 expansion missions in Aikos Choice):
Campaign Progression
- Character introduction - New characters join the squad at story milestones, each accompanied by tutorial scrolls that introduce their abilities and specialty. This progressively expands the players tactical toolbox.
- Ability unlocks - Firearms (matchlock pistols, hand cannon) are unlocked partway through the campaign, adding ranged lethal options for applicable characters.
- Enemy escalation - Early missions feature mostly Normal Guards. Later missions introduce Straw Hat Guards (distraction-resistant, projectile-aware) and Samurai (immune to most indirect attacks, disguise-piercing), demanding increasingly sophisticated tactics.
- Environmental complexity - Snow missions, night missions, and mixed-terrain levels introduce modifiers that alter the stealth loop without changing the core ruleset.
Badge Accumulation
- 117 total badges across the campaign (9 per mission x 13 missions) plus expansion badges.
- Cumulative meta-achievements track campaign-wide milestones: total kills, total hidden bodies, developer collectibles found, and full-badge completion.
- Mastery signaling - Earning all nine badges in a mission is a significant achievement that demonstrates complete mastery of that levels design.
Mastery Iteration
The interplay between hidden first-playthrough badges, mutually exclusive path-choice badges, Hard difficulty requirements, speedrun time limits, and restriction-based badges (no abilities, no kills, specific character only) ensures that replaying a mission feels fundamentally different each time. The quicksave system enables efficient badge-hunting, while the no-save badge constraint creates a parallel challenge for players who want to prove mastery without save assistance.
How the Three Layers Reinforce Each Other
Moment-to-Moment provides the atomic satisfaction of solving a stealth encounter through observation, planning, and precise execution. It drives immediate engagement and flow.
Mission Execution provides structure, stakes, and variety through curated objectives, character rosters, and environmental modifiers. It drives adaptation and strategic breadth.
Meta-Progression provides long-term goals through badges, replayability, and mastery challenges. It drives replay value and skill growth.
The moment-to-moment loop is the engine of engagement: every second of gameplay involves observing, planning, and executing. The mission loop gives that engine direction and variety, forcing the player to adapt their approach to new objectives, rosters, and environments. The meta-loop gives that engine longevity, transforming one-time solutions into repeatable mastery challenges that reward deep understanding of the games interconnected systems.
The result is a stealth experience where the core satisfaction of reading a complex encounter, devising a plan, executing it precisely, and managing the aftermath remains fresh across dozens of hours of play, because the game continuously changes the parameters while keeping the underlying loop constant.