![Visual reference from Прохождение Shadow Tactics: Blades of the Shogun 4 - Шпионы в деревне Хида Спасение Суганума[Проф.] at 25:24-25:34](/published/media/shadow-tactics-blades-of-the-shogun/source-28-preview-e0305f6dd9.jpg)
![Visual reference from Прохождение Shadow Tactics: Blades of the Shogun 4 - Шпионы в деревне Хида Спасение Суганума[Проф.] at 26:57-27:08](/published/media/shadow-tactics-blades-of-the-shogun/source-28-preview-fd1d7c7463.jpg)
![Visual reference from Прохождение Shadow Tactics: Blades of the Shogun 4 - Шпионы в деревне Хида Спасение Суганума[Проф.] at 28:32-28:38](/published/media/shadow-tactics-blades-of-the-shogun/source-28-preview-7ed6918443.jpg)
![Visual reference from Прохождение Shadow Tactics: Blades of the Shogun 4 - Шпионы в деревне Хида Спасение Суганума[Проф.] at 29:03-29:18](/published/media/shadow-tactics-blades-of-the-shogun/source-28-preview-7087379a6d.jpg)
![Visual reference from Прохождение Shadow Tactics: Blades of the Shogun 4 - Шпионы в деревне Хида Спасение Суганума[Проф.] at 35:06-35:18](/published/media/shadow-tactics-blades-of-the-shogun/source-28-preview-dc8e86e1fa.jpg)
![Visual reference from Прохождение Shadow Tactics: Blades of the Shogun 4 - Шпионы в деревне Хида Спасение Суганума[Проф.] at 36:56-37:09](/published/media/shadow-tactics-blades-of-the-shogun/source-28-preview-0745e9f447.jpg)
![Visual reference from Прохождение Shadow Tactics: Blades of the Shogun 5 - Нападение на Каназава Смерть Каге-самы [Проф.] at 20:00-20:00](/published/media/shadow-tactics-blades-of-the-shogun/source-45-preview-7f47095b9d.jpg)
![Visual reference from Прохождение Shadow Tactics: Blades of the Shogun 6 - Предательство на горе Цуру [Профессионал] at 5:00-10:00](/published/media/shadow-tactics-blades-of-the-shogun/source-46-preview-c8b031e7e9.jpg)

Enemy Type Hierarchy
Base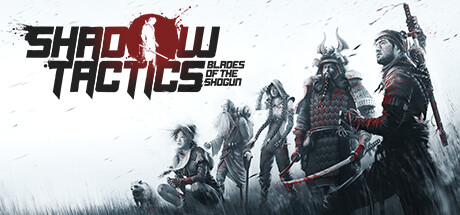
Shadow Tactics: Blades of the Shogun
- Status
- Released
- Year
- 2016
- Genre
- Indie, Strategy
- Platforms
- Windows, macOS, Linux
1. Summary
A three-tier enemy classification system where Normal Guards represent standard threats with cone vision vulnerable to all tactics, Straw Hat Guards are more alert and resistant to distractions, and Samurai are elite heavy enemies immune to most indirect attacks and capable of seeing through disguises. Each tier demands different tactical approaches, requiring specific characters and abilities to defeat advanced threats. Environmental conditions such as snow and darkness can alter enemy behavior patterns.
3. Design Intent / Job Story
When I encounter different enemy types on a mission, I want to understand their vulnerabilities and behavioral patterns, so that I can choose the right character and tactic to neutralize or bypass each threat.
4. Role in Gameplay Loop
- Creates escalating tactical challenge across missions by introducing enemies with increasing resilience and awareness
- Forces players to leverage character specialization and coordinate team abilities against advanced threats
- Enables varied level design through enemy composition and placement of different tiers
- Provides clear visual differentiation through distinct silhouettes (standard guard, straw hat, samurai armor)
5. Preconditions
- Mission has loaded and enemy patrols are active in the level
- Player has at least one controllable character selected
- Enemy AI is in standard patrol state (not already in alarm or combat state)
- Enemy type placement has been defined by level design
6. Parameters
| Parameter | Value | Type | Notes |
|---|---|---|---|
| Normal Guard vision radius | TBD | float | Base distance for Normal Guard vision cone |
| Straw Hat Guard vision radius | TBD | float | Extended vision distance for alert Straw Hat Guards |
| Samurai vision radius | TBD | float | Vision distance for elite Samurai enemies |
| Pistol stun duration on Samurai | TBD | duration | How long a Samurai remains stunned after a matchlock pistol shot |
| Hand Cannon kill on Samurai | true | boolean | Whether Mugen's Hand Cannon can instantly kill Samurai |
| Sniper kill on Samurai | true | boolean | Whether Takuma's sniper rifle can instantly kill Samurai |
| Torch bright zone radius | TBD | float | Area around a torch where visibility is increased for enemies |
| Torch relight investigation delay | TBD | duration | Delay before nearest guard walks to an extinguished torch |
| Disguise detection range (Samurai) | TBD | float | Distance at which Samurai detect Aiko's disguise |
| Shuriken detection chance (Straw Hat) | TBD | float | Probability that a Straw Hat Guard spots a thrown shuriken |
7. Core Rules
- Normal Guards are the baseline enemy type, vulnerable to all elimination methods including melee, shuriken, pistol, and environmental kills
- Straw Hat Guards have heightened alertness and observe a wider area; they can spot thrown projectiles (shuriken) in flight and will raise an alarm
- Straw Hat Guards and Samurai ignore standard distractions such as thrown stones or noise-makers; they can only be lured by corpses
- Samurai wear heavy armor that makes them immune to instant kills from matchlock pistols and bare-handed melee attacks
- Mugen's Hand Cannon and Takuma's sniper rifle are the only ranged weapons capable of killing Samurai outright
- Samurai can see through Aiko's disguise and will attack her on sight
- Some enemies carry torches that create bright zones, increasing visibility for all guards within the light radius
- Extinguishing a torch causes the nearest guard to walk over and relight it, creating a temporary distraction
- Environmental kills (falling objects, animal kicks, trap pits) are effective against all enemy types regardless of armor
8. BDD Scenarios
Scenario: Normal Guard eliminated by melee takedown
- Given
- a Normal Guard is patrolling alone with his back exposed
- When
- the player approaches from behind and executes a melee takedown
- Then
- the guard is killed instantly and silently without raising an alarm
Scenario: Straw Hat Guard spots a thrown shuriken
- Given
- a Straw Hat Guard is on watch duty facing the player's direction
- When
- the player throws a shuriken within the guard's extended observation area
- Then
- the guard notices the projectile in mid-air and raises an alarm
Scenario: Samurai survives a matchlock pistol shot
- Given
- a Samurai is standing in the player's line of sight
- When
- the player shoots the Samurai with a matchlock pistol
- Then
- the Samurai is temporarily stunned but survives and will recover
Scenario: Samurai killed by Mugen's Hand Cannon
- Given
- a Samurai is within Mugen's weapon range
- When
- Mugen fires his Hand Cannon at the Samurai
- Then
- the Samurai is killed instantly by the armor-penetrating shot
Scenario: Samurai sees through Aiko's disguise
- Given
- Aiko is wearing her disguise and walking near a patrolling Samurai
- When
- the Samurai enters detection range of Aiko
- Then
- the Samurai immediately sees through the disguise and begins combat
Scenario: Guard relights extinguished torch
- Given
- a guard is carrying a lit torch near a patrol route
- When
- the player extinguishes the torch from stealth
- Then
- the nearest guard walks to the torch location and relights it
9. Edge Cases
- Straw Hat Guards may spot a player character carrying a body if they are within the extended observation area
- Samurai stunned by a pistol shot will recover after a short duration and raise an alarm if the player has not fled or finished them off
- Multiple Samurai in close proximity require simultaneous elimination to prevent one from alerting the others
- If the player's available characters lack anti-Samurai weapons, they must rely on environmental kills or complete avoidance
- Torch carriers in night or snow missions create overlapping bright zones that compound detection difficulty
- A Straw Hat Guard standing near a Normal Guard may cause the Normal Guard to also investigate disturbances the Straw Hat Guard notices
10. QA Notes
- Verify each enemy type reacts correctly to every character ability (melee, shuriken, pistol, hand cannon, sniper, disguise)
- Test that Straw Hat Guards specifically detect shuriken throws that Normal Guards would not notice
- Confirm Samurai survive matchlock pistol shots across all difficulty settings
- Verify torch relighting behavior triggers for the nearest guard and follows correct pathfinding
- Test disguise detection by Samurai at various distances, angles, and movement speeds
- Confirm environmental kills (falling objects, animal kicks, traps) work on all three enemy types
- Verify that Straw Hat Guards and Samurai ignore standard distractions (stones, whistles)
- Test simultaneous elimination of multiple Samurai using Shadow Mode coordination
11. Mechanic Dependencies
- Stealth Detection System (Stealth Detection System provides the vision cone logic and detection states used by all enemy tiers)
- Character Ability System (Character Ability System defines which characters have the tools to defeat each enemy type (e.g. Mugen's Hand Cannon for Samurai))
- Stealth Elimination Mechanics (Stealth Elimination Mechanics define melee takedown rules that vary by enemy armor class)
- Environmental Interaction System (Environmental Interaction System provides hazards (falling objects, animal kicks) that can kill any enemy type including Samurai)
- Alarm Response System (Alarm Response System governs how enemies react when they spot the player or detect disturbances)
- Character Movement System (Character Movement System defines how player characters can navigate within enemy vision cones)
12. UI Links
- Difficulty Selection Dialog - The Enemy Type Hierarchy behavior is modified by difficulty selection. On Professional, enemies are more aggressive; on Novice, they are less aggressive. The dialog's description text communicates these behavioral differences to the player.
- Enemy Vision Cones - The Enemy Type Hierarchy determines vision cone properties per enemy tier. Normal Guards have standard cones, Straw Hat Guards may have different detection sensitivity, and Samurai elites have enhanced vision ranges. Different enemy types' cones are visually identical but may differ in size and detection speed.
References
- 1.
Steam Community :: Guide :: Shadow Tactics: Full Character Guides and Tricks (L18-20 of 116)
- 2.
Steam Community :: Guide :: Shadow Tactics: Full Character Guides and Tricks (L65-73 of 116)
- 3.
Прохождение Shadow Tactics: Blades of the Shogun #4 - Шпионы в деревне Хида|Спасение Суганума[Проф.] (25:24-25:34)
- 4.
Прохождение Shadow Tactics: Blades of the Shogun #4 - Шпионы в деревне Хида|Спасение Суганума[Проф.] (26:57-27:08)
- 5.
Прохождение Shadow Tactics: Blades of the Shogun #4 - Шпионы в деревне Хида|Спасение Суганума[Проф.] (28:32-28:38)
- 6.
Прохождение Shadow Tactics: Blades of the Shogun #4 - Шпионы в деревне Хида|Спасение Суганума[Проф.] (29:03-29:18)
- 7.
Прохождение Shadow Tactics: Blades of the Shogun #4 - Шпионы в деревне Хида|Спасение Суганума[Проф.] (35:06-35:18)
- 8.
Прохождение Shadow Tactics: Blades of the Shogun #4 - Шпионы в деревне Хида|Спасение Суганума[Проф.] (36:56-37:09)
- 9.
Прохождение Shadow Tactics: Blades of the Shogun #5 - Нападение на Каназава|Смерть Каге-самы [Проф.] (20:00-20:00)
- 10.
Прохождение Shadow Tactics: Blades of the Shogun #6 - Предательство на горе Цуру [Профессионал] (5:00-10:00)