![Visual reference from Desperados 3 Let's Play Gameplay Walkthrough Pt 12 The Wages Of Pain [1440p w/ Commentary] at 4:23-4:28](/published/media/desperados-3/source-335-preview-f22af3efa3.jpg)
![Visual reference from Desperados 3 Let's Play Gameplay Walkthrough Pt 12 The Wages Of Pain [1440p w/ Commentary] at 19:15-19:45](/published/media/desperados-3/source-335-preview-947dfaf88c.jpg)
![Visual reference from Desperados 3 Let's Play Gameplay Walkthrough Pt 5 Bridge At Eagle Falls [1440p w/ Commentary] at 41:30-41:42](/published/media/desperados-3/source-326-preview-1c8a1af2ed.jpg)
![Visual reference from Desperados 3 Let's Play Gameplay Walkthrough Pt 5 Bridge At Eagle Falls [1440p w/ Commentary] at 44:36-45:30](/published/media/desperados-3/source-326-preview-3522c83a43.jpg)
![Visual reference from Desperados 3 Let's Play Gameplay Walkthrough Pt 6 Closing In On New Orleans [1440p w/ Commentary] at 46:21-47:02](/published/media/desperados-3/source-329-preview-9b06ae0f38.jpg)

Enemy Perception and Alarm AI
Base
Desperados 3
- Status
- Released
- Year
- 2020
- Genre
- Strategy
- Platforms
- Windows, macOS, Linux
1. Summary
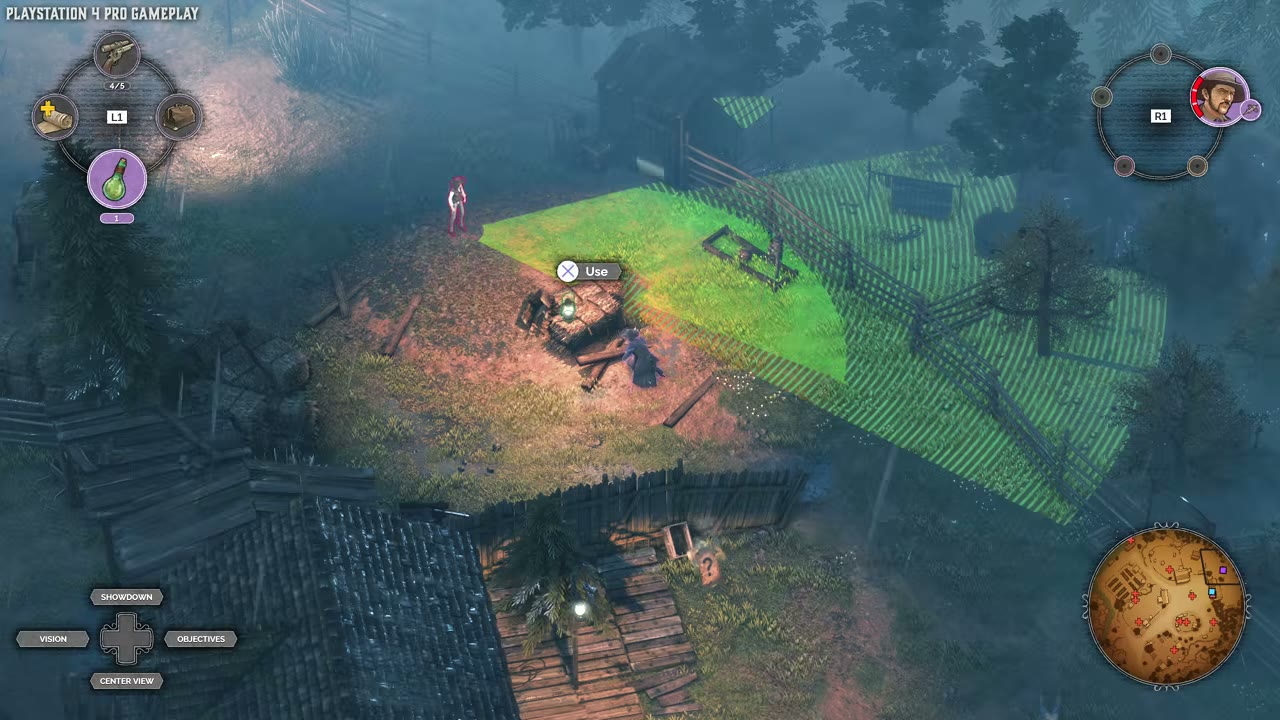
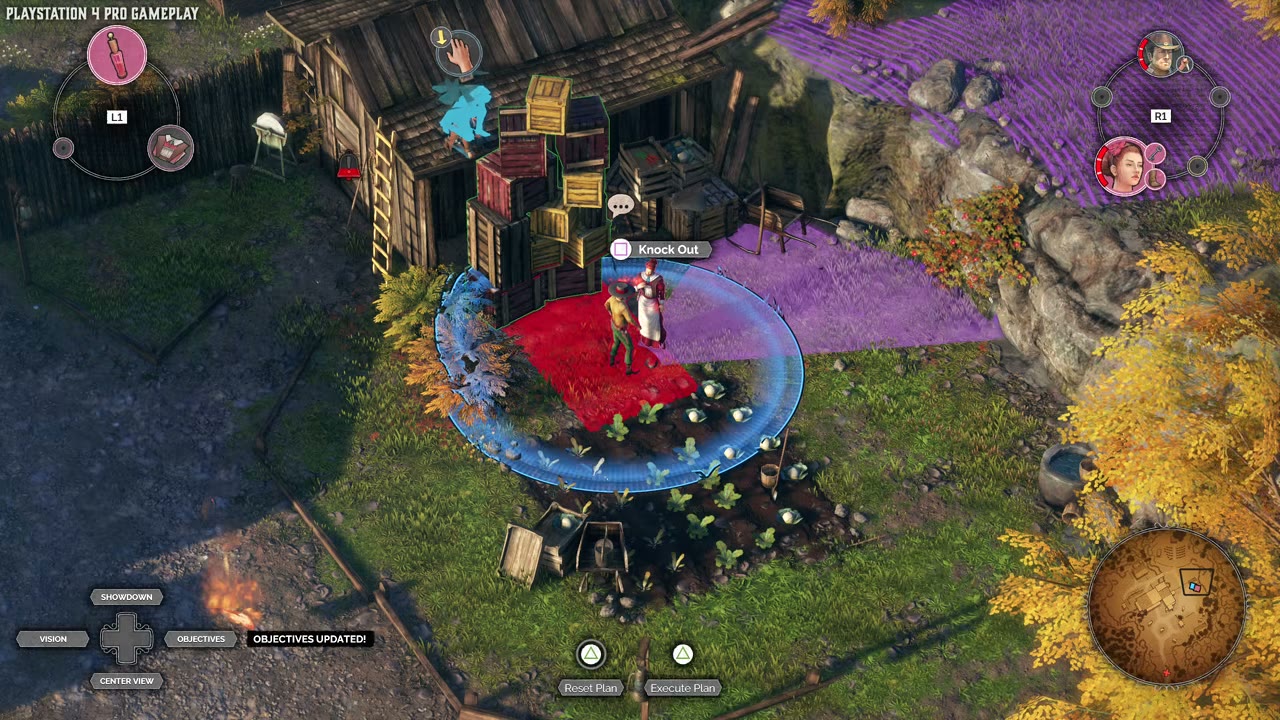
Enemy behavior is governed by visible perception, patrol awareness, alert escalation, and reinforcement consequences. Vision cones show safe, suspicious, and detected states; enemies watch one another's backs, react to bodies and noises, investigate disturbances, and call alarms when suspicious discoveries escalate. Enemy categories such as Gunmen, Ponchos, Long Coats, dogs, and civilians respond differently to tools, disguises, and lures, creating the tactical puzzle of each encounter.
3. Design Intent / Job Story
When planning movement, takedowns, or distractions inside guarded space, I want enemy awareness to be readable and predictable, so that I can manipulate sight, sound, investigation, and alarm escalation without breaking stealth.
4. Role in Gameplay Loop
- Defines the primary stealth pressure that turns map traversal into a tactical puzzle.
- Converts player actions, bodies, noises, and line-of-sight exposure into enemy investigation or alarm responses.
- Gives reconnaissance value to vision cones, view-cone markers, patrol observation, and enemy line-of-sight relationships.
- Creates timing windows for synchronized takedowns, body removal, lures, and movement across exposed ground.
- Links failure, reinforcement, and recovery systems to detected characters or discovered bodies.
5. Preconditions
- A mission is in active gameplay and enemy NPCs or alert-capable civilians are present.
- Enemy AI has a patrol, idle, conversation, watch, or investigation state that can be evaluated.
- The player-controlled character, body, noise source, suspicious event, or target location is inside a perceivable world area.
- Line-of-sight, terrain obstruction, stance, and visibility rules can determine whether a target is seen.
- Noise-producing actions have a radius or hearing target that can be compared against nearby listeners.
- Alarm consequences are enabled for the current mission state, unless the scenario intentionally suppresses them.
6. Parameters
| Parameter | Value | Type | Notes |
|---|---|---|---|
| Vision cone state | Green / Yellow / Red | enum | Visual awareness state for enemy sight coverage, suspicion build-up, and confirmed alert. |
| Detection fill time | System-defined per enemy, stance, distance, and exposure | duration | Time a visible character can remain in effective sight before suspicion becomes confirmed detection. |
| View-cone marker target | Ground point / enemy / friendly unit | target reference | Object or location used to query which enemies can see a position or target. |
| Noise radius | Per action or weapon | distance | Area in which a noise-producing action can be heard and converted into investigation or alert. |
| Listener indicator | Zero or more enemies | UI marker set | Off-screen or in-world indications of enemies that will hear a selected noisy action. |
| Investigation state | None / Suspicious / Investigating / Returning | enum | Enemy behavior phase after seeing a suspicious event, hearing a lure, or finding evidence. |
| Alarm trigger | Body discovered, character detected, visible takedown, loud unresolved event | event | Conditions that can escalate local suspicion into an alarm or reinforcement call. |
| Reinforcement response | Mission/system-defined | encounter event | Consequence spawned or activated after an alarm is successfully raised. |
| Patrol resume delay | System-defined | duration | Time between an investigated incident being resolved and the enemy returning to its routine. |
| Stance visibility modifier | Standing / Crouched / Hidden vegetation | multiplier/flag | Modifier affecting how safely a character can pass through or remain inside parts of enemy vision. |
7. Core Rules
- Enemy vision is represented by visible cone coverage; entering or remaining in effective sight escalates from safe coverage toward suspicion and alert.
- Vision-cone color and fill communicate detection risk: green cone coverage is safe to evaluate, yellow fill indicates an enemy is becoming suspicious, and red/alert state means the enemy has identified the player position.
- The player can place or assign view-cone markers to locations, enemies, or friendly units to reveal which enemies can see that point or target.
- Enemies can watch one another; a takedown or body interaction that is visible to another enemy can raise suspicion or alarm even if the acting character is otherwise hidden.
- If an enemy sees a dead or incapacitated body in its vision cone, the enemy investigates regardless of whether the original action made noise.
- Discovered bodies can trigger an alarm and call reinforcements if the situation escalates beyond investigation.
- Noise-producing actions expose a radius or listener set; enemies inside the relevant hearing area may leave patrol or idle behavior to investigate the source.
- Very loud actions, such as high-noise firearms, can alert a broad surrounding area rather than only the nearest guard.
- If the player remains unseen after an accident or suspicious event, guards may investigate the incident and then return to normal routines.
- Enemy patrols, conversations, and attention changes create temporary blind spots and timing windows that the player can exploit.
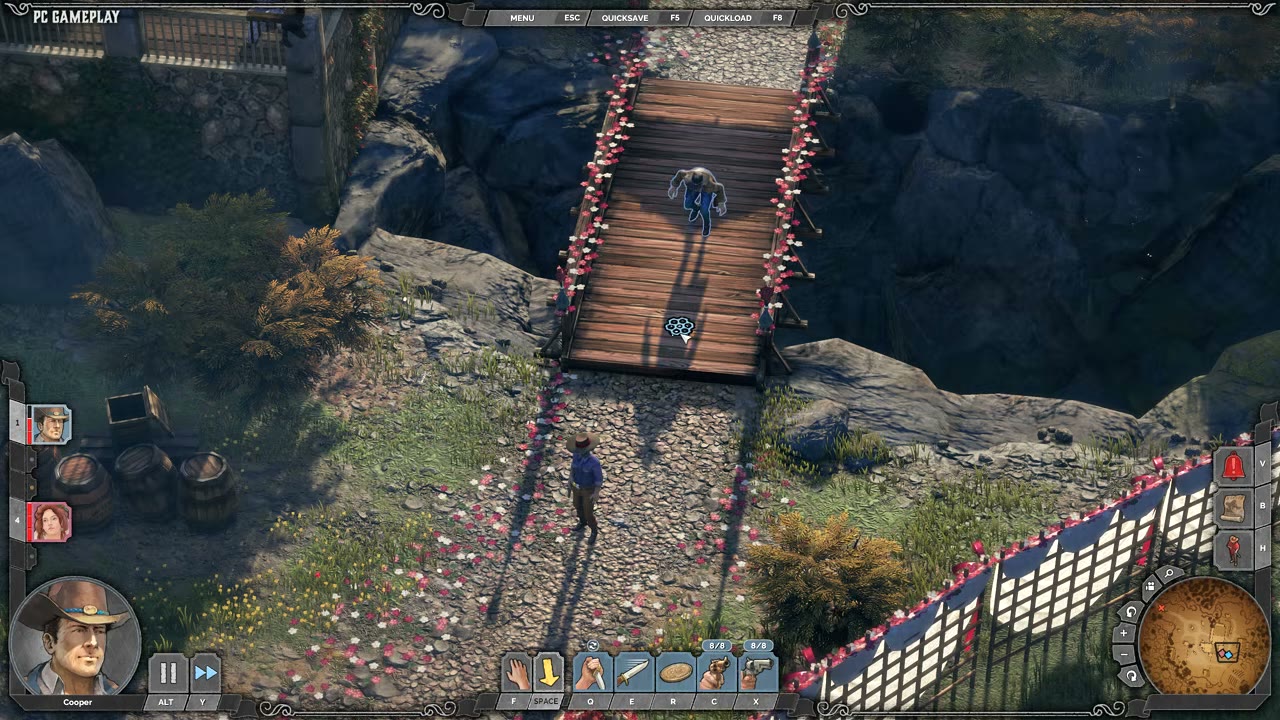
- Movement stance changes detection timing: crouching can reduce exposure in parts of vision cones, but slow crouched movement can also leave a character exposed long enough to be spotted.
- Detection of a mission-critical character or unresolved alarm escalation can lead to combat, forced reload, or mission failure depending on mission rules.
8. BDD Scenarios
Scenario: Character crosses visible enemy sight
- Given
- an enemy has active vision cone coverage over a path
- When
- a player-controlled character remains inside the effective sight area long enough to be recognized
- Then
- the enemy escalates from suspicion to alert
- And
- the enemy responds to the character's position according to mission rules
Scenario: Player uses a view-cone marker for reconnaissance
- Given
- the player is evaluating a risky position or target
- When
- the player places or assigns a view-cone marker to that point, enemy, or friendly unit
- Then
- the game indicates which enemies can see that location or target
- And
- the player can use that information before committing to movement or a takedown
Scenario: Guard investigates a noise lure
- Given
- a guard is eligible to react to a noise-producing distraction
- When
- the distraction occurs inside the guard's hearing response area
- Then
- the guard leaves the current routine and investigates the noise source
- And
- the guard returns to normal behavior if no further evidence escalates the state
Scenario: Guard discovers a body
- Given
- a dead or incapacitated body is inside an enemy's active vision cone
- When
- the enemy perceives the body
- Then
- the enemy investigates the body location
- And
- the discovery can escalate into an alarm and reinforcement response
Scenario: Hidden accident does not immediately reveal the player
- Given
- an accident or environmental kill occurs while the player remains unseen
- When
- guards notice the incident but have no direct evidence of the player
- Then
- guards investigate the incident location
- And
- they may return to routine if no further suspicious evidence is found
Scenario: Missed synchronized takedown raises alarm
- Given
- two enemies can observe each other or a shared kill zone
- When
- the player neutralizes only one enemy before the witness is controlled
- Then
- the remaining witness escalates awareness
- And
- the alarm can be raised if the witness is not interrupted in time
9. Edge Cases
- Player character enters a cone only briefly: confirm detection fill resets or decays according to intended rules after leaving sight.
- Multiple enemies see the same target: highest-priority alert state should win and all relevant guards should respond coherently.
- Enemy sees a body but not the player: investigation/alarm should target the evidence location, not magically reveal the player.
- Enemy hears a lure while already investigating: state priority should prevent oscillation between incompatible destinations.
- Loud weapon affects off-screen listeners: listeners outside the camera view must still react if they are inside the hearing radius.
- Body is removed while a guard is walking to investigate it: guard should resolve the missing evidence without entering a broken loop.
- Accident kill occurs in view but player remains hidden: guards may investigate the incident without treating it as player-authored unless other evidence exists.
- Player uses crouch in partial cone coverage: visibility should match terrain/stance rules and not only the cone overlay color.
- Alarm begins during Showdown or queued actions: queued actions should resolve against the current live AI state once execution starts.
- Mission failure and reload flow should handle detection cleanly without leaving AI in an alert state after loading.
10. QA Notes
- Test green, yellow, and red vision-cone state transitions with standing, crouched, and hidden targets.
- Verify view-cone markers correctly identify every enemy watching a ground point, enemy, or friendly unit, including distant off-screen guards.
- Place bodies inside and outside patrol sight lines and confirm investigation, alarm, reinforcement, or patrol-resume behavior matches design.
- Trigger quiet, medium, and very loud actions and confirm only enemies within the correct hearing logic react.
- Validate that lures and thrown distractions pull eligible guards from patrol, then return them to normal routines when unresolved.
- Confirm visible simultaneous takedowns do not raise alarm when all witnesses are neutralized within the intended timing window.
- Confirm one guard witnessing another guard's takedown raises suspicion/alarm when the timing window is missed.
- Verify mission failure/reload behavior after hard detection or critical-character death leaves no persistent alert artifacts.
- Test overlapping cones and multiple listeners at different camera zoom levels to ensure UI and AI remain synchronized.
11. Mechanic Dependencies
- Tactical Stealth Mission Loop (The tactical stealth mission loop depends on enemy perception to define forbidden space, patrol pressure, and the consequences of being detected.)
- Trial-and-Error Save Iteration Loop (Trial-and-error save iteration is used heavily because perception failures, alarms, and mission failures often require immediate reload and retry.)
- Disguise and Social Infiltration (Disguise and social infiltration modifies how enemies perceive a character and which enemy categories can see through social cover.)
- Showdown Synchronized Planning (Showdown synchronized planning helps the player neutralize enemies before witnesses can escalate perception into alarm.)
- Takedown and Body Control (Takedown and body control depends on perception because visible kills or discovered bodies can trigger investigation, alarm, and reinforcements.)
- Distraction and Noise Manipulation (Distraction and noise manipulation feeds perception by creating heard events that pull enemies into investigation states.)
- Movement, Terrain, and Cover Navigation (Movement, terrain, and cover navigation affect whether characters are exposed inside vision cones, blocked by obstacles, hidden, or spotted while crossing gaps.)
12. UI Links
- Mission Failed Recovery Screen - Mission Failed Recovery Screen appears when perception or combat consequences produce a hard fail state such as detection leading to critical character death.
- Right Side Alert And Hint Buttons - Right Side Alert And Hint Buttons provide persistent HUD affordances for warning or guidance states related to tactical danger and player attention.
- Tactical Spatial Markers - Tactical Spatial Markers expose enemy vision cones, alert/question markers, targeting overlays, and view-cone information that make perception state readable in the playfield.
References
- 1.
Desperados III (L3-8 of 50)
- 2.
DESPERADOS III - Know THESE Important Tips Before Playing (3:17-4:23)
- 3.
DESPERADOS III - Know THESE Important Tips Before Playing (5:24-5:39)
- 4.
DESPERADOS III - Know THESE Important Tips Before Playing (7:52-8:32)
- 5.
Desperados 3 Let's Play Gameplay Walkthrough Pt 12 The Wages Of Pain [1440p w/ Commentary] (4:23-4:28)
- 6.
Desperados 3 Let's Play Gameplay Walkthrough Pt 12 The Wages Of Pain [1440p w/ Commentary] (19:15-19:45)
- 7.
Desperados 3 Let's Play Gameplay Walkthrough Pt 5 Bridge At Eagle Falls [1440p w/ Commentary] (41:30-41:42)
- 8.
Desperados 3 Let's Play Gameplay Walkthrough Pt 5 Bridge At Eagle Falls [1440p w/ Commentary] (44:36-45:30)
- 9.
Desperados 3 Let's Play Gameplay Walkthrough Pt 6 Closing In On New Orleans [1440p w/ Commentary] (46:21-47:02)