![Visual reference from Desperados 3 Let's Play Gameplay Walkthrough Pt 1 Prologue & Byers Pass [1440p w/ Commentary] at 35:11-35:13](/published/media/desperados-3/source-322-preview-98ab075088.jpg)
![Visual reference from Desperados 3 Let's Play Gameplay Walkthrough Pt 1 Prologue & Byers Pass [1440p w/ Commentary] at 35:04-35:06](/published/media/desperados-3/source-322-preview-769003917f.jpg)

Tactical Spatial Markers
Desperados 3
- Status
- Released
- Year
- 2020
- Genre
- Strategy
- Platforms
- Windows, macOS, Linux
1. Summary
Spatial HUD overlays anchored to the isometric game world that expose tactical planning information: enemy vision cones, alert markers, interaction prompts, and Showdown/path markers. They let the player read stealth risk and plan movement without opening a separate screen.
Overview
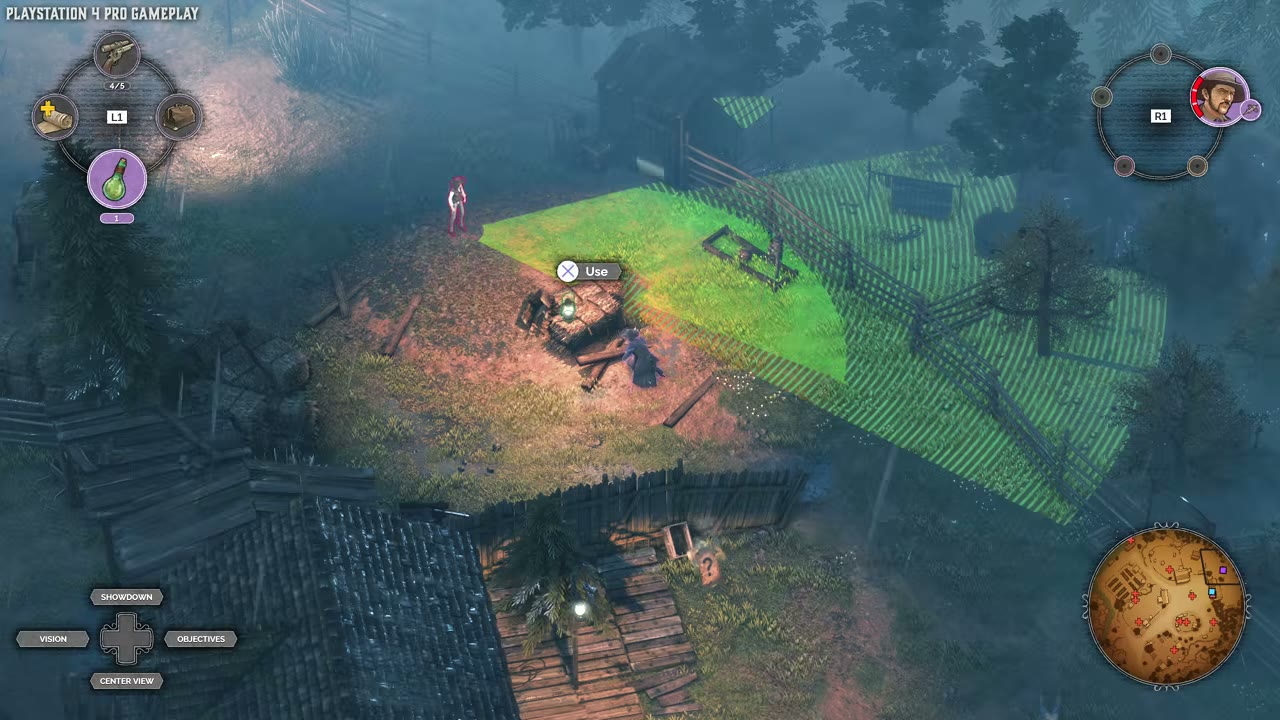
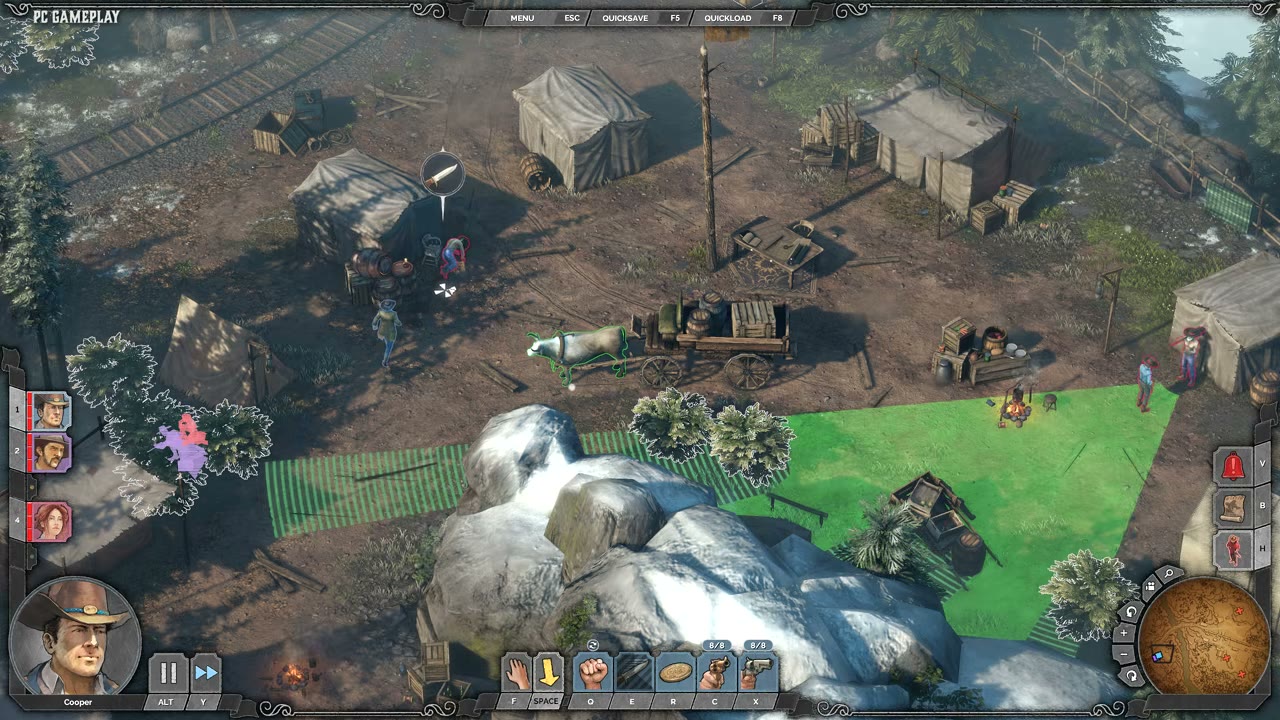
Tactical Spatial Markers are the world-space HUD layer used during Desperados III gameplay to make stealth information visible directly on the isometric map. Instead of opening a separate tactical screen, the game projects viewcones, prompts, and attention markers over characters, terrain, and interactable objects so the player can evaluate risk in context.
The clearest marker type is the enemy viewcone: a translucent wedge projected on the ground from the enemy or selected line-of-sight source. The evidence shows both a magenta/purple selected viewcone and green active coverage cones, each using a striped fill so terrain remains visible underneath.
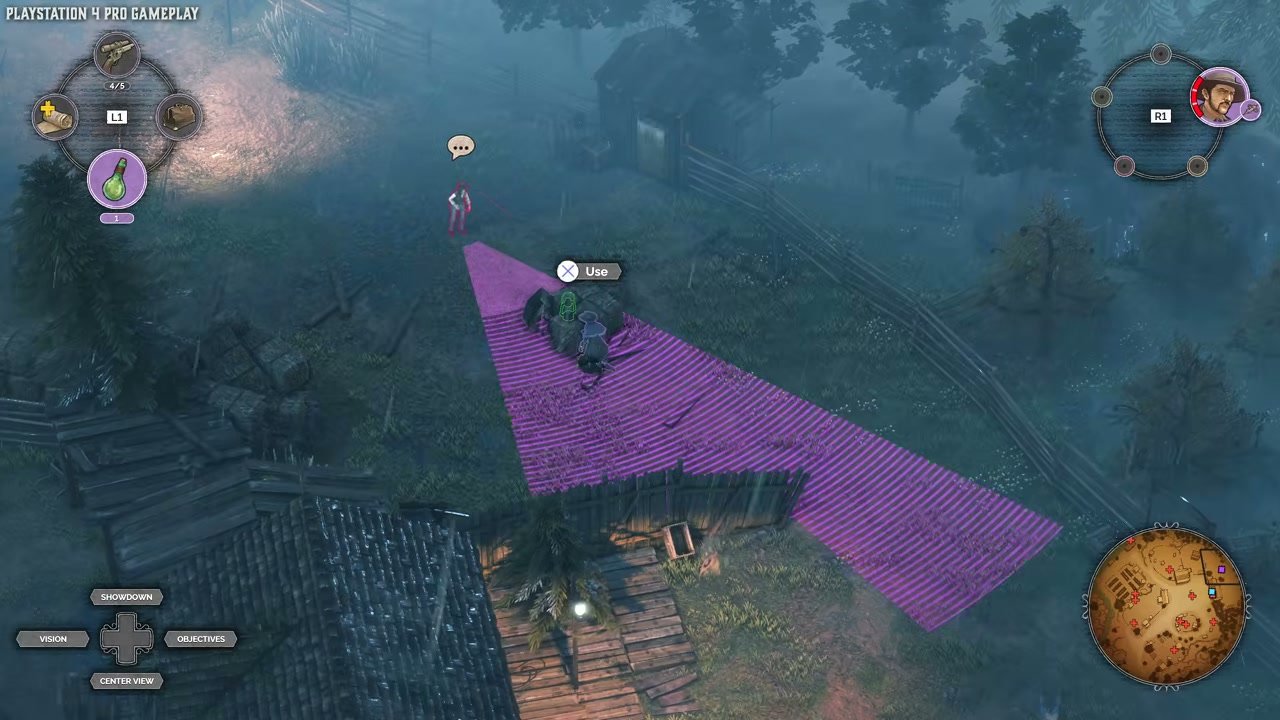
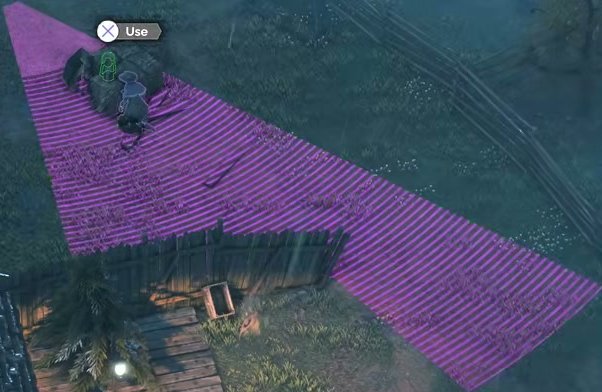
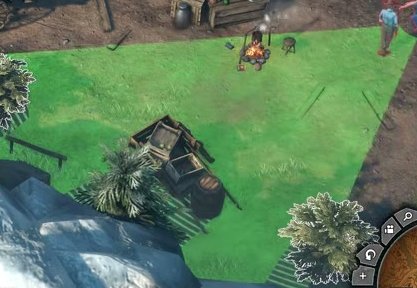
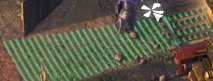

The same layer also carries interaction prompts and alert indicators. A small input prompt can attach to a nearby target, while a high-contrast exclamation icon floats over a location that needs attention. These markers are spatial rather than diegetic: they are anchored to the game world for player planning, but they are not objects the characters perceive.
Job Story
When I am planning a stealth route or synchronized takedown, I want tactical markers to appear directly over enemies, terrain, and interactable objects, so that I can judge detection risk and command availability without leaving the map view.
Classification
- diegesis: Spatial
- functional_type: HUD
- component_type: Tooltip
Wireframe
+--------------------------------------------------------------+
| Isometric gameplay world                                     |
|                                                              |
|          [!] floating alert marker                           |
|              |                                               |
|      NPC --> <green/magenta translucent vision cone>          |
|                                                              |
|                [X Use] interaction prompt                    |
|                     Selected character / target              |
|                                                              |
| Edge HUD remains outside this layer: roster, action bar, map |
+--------------------------------------------------------------+
Components
- Translucent vision cone projection anchored to an enemy, marker, or inspected line-of-sight source.
- Diagonal stripe fill inside cone overlays to differentiate tactical coverage from terrain shading.
- Floating alert/attention marker, typically a high-contrast icon above a world point.
- Context interaction prompt with input glyph and short action verb.
- Target/selection outlines on characters or interactables when a command can be issued.
- Optional Showdown/path preview indicators sharing the same world-space overlay layer.
Parameters & Audio
| Parameter | Value | Type | Notes |
|---|---|---|---|
| Vision cones use semi-transparent saturated color, with green for evaluated enemy coverage and magenta/purple for selected or marked coverage. | Vision cones use semi-transparent saturated color, with green for evaluated enemy coverage and magenta/purple for selected or marked coverage. | Text | — |
| Cone interiors use repeated diagonal striping to remain readable over complex terrain. | Cone interiors use repeated diagonal striping to remain readable over complex terrain. | Text | — |
| Floating markers use high-contrast iconography and a small vertical offset above the source object. | Floating markers use high-contrast iconography and a small vertical offset above the source object. | Text | — |
| Marker appearance should be immediate on selection/hover/command mode entry and clear immediately when the relevant tactical state ends. | Marker appearance should be immediate on selection/hover/command mode entry and clear immediately when the relevant tactical state ends. | Text | — |
| Audio is not the primary carrier for this UI element; any sounds should support the underlying event, such as alert or command selection, rather than the marker itself. | Audio is not the primary carrier for this UI element; any sounds should support the underlying event, such as alert or command selection, rather than the marker itself. | Text | — |
Dependencies & Logic
- Enemy AI perception state determines cone origin, direction, range, and whether the cone is currently relevant to the player.
- Terrain and obstruction data determine where viewcones should extend and where line of sight is blocked.
- Player selection, cursor targeting, and interactable availability determine whether prompts such as Use appear.
- Showdown Mode and ability targeting systems determine queued-action markers and path/target previews.
- Alert and hint systems determine floating exclamation or attention markers.
- Camera zoom and pan must keep all spatial markers aligned to their world anchors.
BDD Scenarios
Scenario: Inspect enemy vision coverage
- Given
- the player is in live gameplay with an enemy visible on the map
- When
- the player activates or inspects that enemy's viewcone marker
- Then
- a translucent cone appears in the world-space overlay layer
- And
- the cone remains aligned to the enemy's line of sight while the camera view is active
Scenario: Show available interaction prompt
- Given
- the selected character is near an interactable object or valid command target
- When
- the player targets that object
- Then
- a compact prompt appears above the target with an input glyph and action label
Scenario: Alert marker draws tactical attention
- Given
- the game raises an alert, hint, or point-of-interest state
- When
- the relevant world position is visible
- Then
- a floating marker appears above that position
- And
- the marker remains visually separate from edge HUD controls
Scenario: Cancel tactical preview
- Given
- a vision cone, targeting marker, or Showdown preview is visible
- When
- the player cancels the selection or exits the planning state
- Then
- the spatial marker is removed or replaced with the current relevant marker state
Edge Cases
- Multiple overlapping cones must stay readable through color, striping, and transparency rather than becoming solid blocks.
- Cones crossing complex terrain should not visually imply visibility through hard blockers if the underlying line-of-sight simulation blocks vision.
- Floating markers near screen edges should remain visible without colliding with persistent HUD elements.
- Prompts and markers attached to moving characters must update position smoothly and not lag behind their anchor.
- If a target becomes invalid while a prompt is visible, the prompt should clear immediately.
- During camera zoom/pan, spatial markers must preserve world alignment and avoid screen-space drifting.
QA Notes
- Verify green and magenta/purple vision cone states against live gameplay, not only tutorial slides.
- Test marker alignment at different camera zoom levels and after camera panning.
- Confirm markers remain readable over dark terrain, bright terrain, foliage, props, and moving characters.
- Confirm edge HUD elements such as roster, action bar, radial selector, and minimap do not obscure critical world-space markers.
- Test transitions into and out of Showdown Mode, ability targeting, interaction targeting, alert states, and cancellation.
Mechanic Links
- Tactical Stealth Mission Loop - Tactical spatial markers expose view cones, alert markers, targeting prompts, and other map-anchored feedback needed to assess stealth risk.
- Disguise and Social Infiltration - Tactical spatial markers display the green safe zone shield indicator, vision cone color changes when a character is disguised (green = safe, yellow = suspicious, red = detected), detection icons above enemy heads, and the ground-area highlight for safe zones.
- Showdown Synchronized Planning - Tactical Spatial Markers show view cones, prompts, targeting overlays, and Showdown/path markers that let the player judge whether a queued plan is safe before execution.
- Squad Character Ability System - Tactical spatial markers display ability targeting feedback, vision cones, noise/range risks, interaction prompts, and queued-action markers needed to validate ability use.
- Environmental Interaction and Accident Kills - Tactical spatial markers expose hazard prompts, affected areas, viewcones, alert markers, and other world-space feedback needed to plan accident kills.
- Takedown and Body Control - Tactical spatial markers show vision cones, alert icons, targeting prompts, and noise/awareness overlays that determine whether takedowns and bodies are safe.
- Enemy Perception and Alarm AI - Tactical Spatial Markers expose enemy vision cones, alert/question markers, targeting overlays, and view-cone information that make perception state readable in the playfield.
- Lethal and Non-Lethal Combat Resource Limits - Tactical Spatial Markers expose combat risk through noise radii, listener indicators, vision cones, target prompts, and alert markers that affect whether a resource can be used safely.
- Distraction and Noise Manipulation - Tactical spatial markers show the vision cones, speech/question indicators, noise/targeting feedback, and world-space response cues needed to judge distraction safety.
- Movement, Terrain, and Cover Navigation - Tactical Spatial Markers expose enemy vision cones, interaction prompts, and risky world-space positions that players use to plan safe movement routes.
- Cooper's Gunslinger Kit - Tactical Spatial Markers communicate targeting lines, valid or invalid ranges, noise and distraction areas, queued-action markers, and enemy vision risk while using the kit.
- Doc McCoy's Apothecary Sniper Kit - Tactical Spatial Markers expose vision cones, targeting overlays, prompts, and alert markers needed to judge whether sniping, lure placement, gas use, lockpicking, or cleanup is safe.
- Hector's Brute Trapper Kit - Tactical spatial markers display vision cones, lure targeting circles, trap placement feedback, noise/ear indicators, and target labels that make the kit's risk areas readable.
- Kate's Femme Fatale Kit - Tactical Spatial Markers expose the enemy vision cones, targeting previews, and affected areas needed to judge disguise safety, perfume throws, lure paths, and witness risk.
- Isabelle's Voodoo Witch Kit - Spatial markers communicate ranges, control radius, vision cones, targets, and world-space safety feedback.
References
- 1.
DESPERADOS III - Know THESE Important Tips Before Playing (3:20-3:22)
- 2.
DESPERADOS III - Know THESE Important Tips Before Playing (4:48-4:50)
- 3.
Desperados 3 Let's Play Gameplay Walkthrough Pt 1 Prologue & Byers Pass [1440p w/ Commentary] (35:11-35:13)
- 4.
Desperados 3 Let's Play Gameplay Walkthrough Pt 1 Prologue & Byers Pass [1440p w/ Commentary] (35:04-35:06)